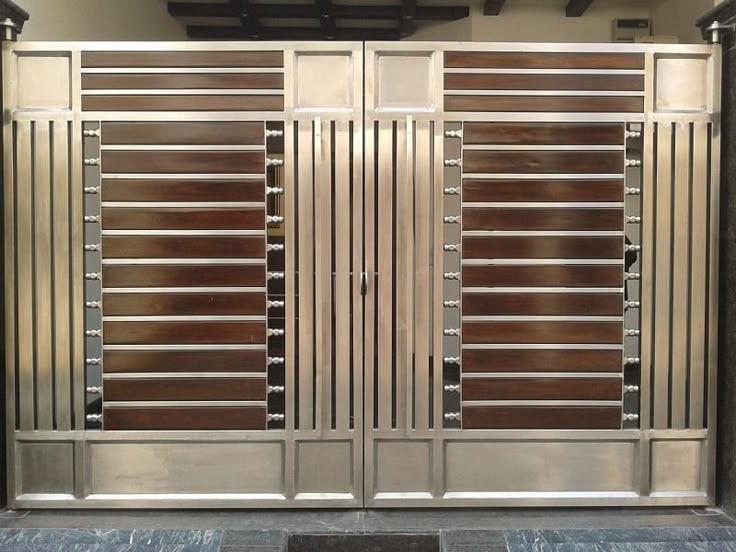
A secure home begins with the right entrance. In Singapore, many households rely on a Mild Steel Gate to provide safety without losing style. These gates offer a mix of strength, lasting quality, and clean design. Whether you’re upgrading an old one or building fresh, installing it correctly ensures it works well for years.
This guide explains how to install a mild steel gate at home, with clear steps that apply especially to HDB Gate setups. Whether you’re a first-time DIYer or helping a professional, knowing the process helps you stay informed and prepared.
Before You Begin – Tools and Checks
Before you drill or bolt anything, gather your tools and inspect the area. Missing steps early on lead to costly mistakes later.
Gather These Tools
- Measuring tape
- Drill with metal and masonry bits
- Spanner set
- Spirit level
- Screws, bolts, and wall plugs
- Pencil or chalk for marking
Inspect Your Entrance
Check if your doorway has even surfaces. Most HDB Gate entrances come with mild differences in height or frame alignment. Use your spirit level to spot tilts or curves. If needed, sand down sharp edges or clean away dust and old paint.
Step 1 – Measure Twice, Order Once
Measuring the space correctly sets the tone for your entire installation. A misfit gate causes sagging, rubbing, or safety issues.
What to Measure:
- Height from floor to top frame
- Width from wall to wall
- Depth of the wall frame has corners or thickness
Take each measurement at three points—top, middle, and bottom. Choose the smallest reading to avoid tight spots.
Use these numbers when buying or ordering a custom Mild Steel Gate.
Step 2 – Mark the Fixing Points
Lay the gate flat near the entrance. Check its swing direction and confirm you’ll mount it on the correct side. Most gates open outward, away from the home.
- Create Your Marks:
With help from another person, hold the gate in position. Use a pencil or chalk to mark hinge spots. Also, mark the latch and stopper positions.
These markings guide your drill later. Get this step right to prevent misaligned holes or hinges that creak or resist movement.
Step 3 – Drill the Mounting Holes
Once you mark everything clearly, drill the holes. Choose the correct drill bit for the job—masonry bits for brick or concrete, and metal bits for door frames.
Tips for Drilling
- Use slow, steady pressure
- Keep your drill straight
- Drill 1–2 mm deeper than the bolt length
After drilling, clean out dust and tap in wall plugs if needed. A clean hole ensures the bolts grip tightly.
Most HDB Gate frames already come with guide holes, but always double-check spacing and size.
Step 4 – Install the Hinges
Hinges support the gate’s weight. If they tilt or sit crooked, the entire structure suffers.
- Fit Hinges with Care:
Hold the gate while your partner aligns it with the drilled holes. Fix the top hinge first, then the lower one. Use washers where necessary to reduce friction.
Tighten the bolts evenly and avoid forcing them. Once both hinges lock in, swing the gate gently to test for movement.
This is a key step when learning how to install a mild steel gate at home. Take your time and focus.
Step 5 – Check Alignment and Movement
Now that the gate hangs from the hinges, open and close it a few times. Watch how it behaves.
Spot Common Issues
- Scraping at the bottom means uneven hinges
- Hard closing may suggest frame tilt
- Gaps between the gate and wall reduce security
Use a spanner to adjust hinge tightness. Sometimes, small rubber spacers help lift one side slightly for a better swing.
A correctly installed Mild Steel Gate should open smoothly and close firmly without a bang.
Step 6 – Fix the Latch and Stopper
Most gates come with a latch, handle, or digital lock. You also need a stopper so the gate doesn’t swing wildly or hit the wall.
- Add These Last Components:
Mark the latch plate holes and drill carefully. Fit screws, check alignment, and test locking. The stopper usually attaches to the wall or floor—place it where the gate stops naturally.
Test both pieces at least five times. Make sure the lock doesn’t jam and that kids or elderly family can use it easily.
Optional Step – Paint and Finish
Some homeowners repaint the gate after installation. Others prefer the gate’s raw or powder-coated finish. If painting, use anti-rust paint and mask areas you wish to keep clean.
- Cleaning the Area:
After everything’s done, wipe metal shavings, dust, and chalk marks. Oil the hinges to prevent squeaking.
Your HDB Gate now stands strong and looks clean, ready to protect your home.
Tips for Better Results
Mistakes often come from rushing or skipping checks. Take time at each stage, especially while marking or drilling.
Here are a few added tips in table format for clarity:
Common Mistakes and How to Avoid Them
| Mistake | How to Avoid |
| Misaligned gate | Use a spirit level and double-check marks |
| Wobbly hinges | Tighten bolts evenly and use washers |
| Hard to open/close | Adjust the swing by loosening or adding spacers |
| The gate hits the wall | Install a stopper at the right distance |
| The latch won’t lock properly | Drill straight and align the latch plate |
These tips save time and help your gate last longer.
When to Call a Professional?
Some installations prove harder than expected. You might drill into tough concrete, hit wiring, or find the wall frame slants too far. In these cases, calling a licensed contractor helps.
They bring tools, materials, and experience. If you plan to install a gate with a digital lock or security camera, a trained technician ensures safety and function.
Though many homeowners want to try how to install a mild steel gate at home, it’s also smart to know your limits.
Why Mild Steel Works Well for HDB Homes?
Mild steel stays popular for gates because it balances strength with style. You can bend or cut it into many designs. It also resists most wear and weather, especially with proper coating.
- A Reliable Choice:
Unlike heavier metals, mild steel doesn’t overload old HDB walls or hinges. It stands firm during storms and daily use. Many Singapore homes rely on this material because it combines low upkeep with strong looks.
When choosing a gate for your HDB Gate frame, mild steel delivers on function without sacrificing appearance.
Conclusion
Installing a gate involves more than just tools. It requires planning, clear steps, and patience. Now that you’ve learned how to install a mild steel gate at home, you can tackle the task with confidence.
Each bolt, hinge, and latch matters. Whether you live in a flat or a landed house, the process remains similar. With care and attention, you’ll finish with a gate that swings smoothly and protects proudly.
FAQ’s
1. What should I check before starting the installation?
Check the wall or pillar strength—it should be solid enough to support the gate’s weight. Also, measure the opening carefully to ensure the gate size fits the space with enough room for swinging open.
2. How do I attach the gate to the hinges?
Lift the gate and slide the hinge pins into the hinge brackets. This step may need a second person to help hold the gate steady while you align and insert the hinges.
3. What maintenance does a mild steel gate need after installation?
Wipe the gate regularly to remove dust and moisture. Oil the hinges and latch every few months. Check bolts or screws occasionally and tighten if they come loose over time.