Ordering cereal packaging tailored to your brand is more than just choosing a box. It’s a strategic process that helps elevate your product’s identity, protection, and shelf presence. This guide walks you through every important step with clarity, covering design, material, supplier coordination, and final delivery.
Evaluate Product Requirements and Brand Position
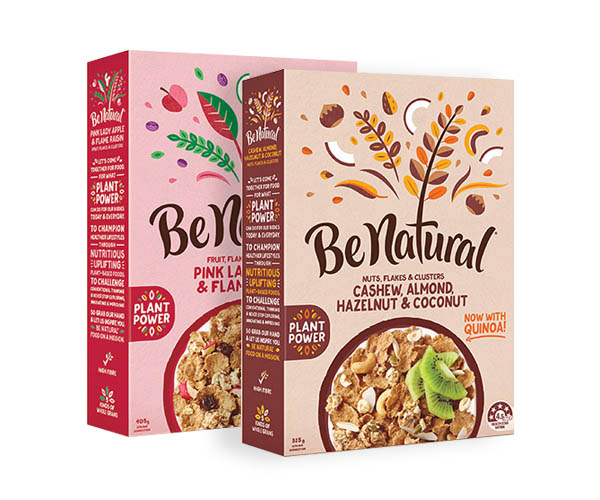
Every custom cereal boxes product serves a distinct purpose. Some are geared toward children, others toward athletes, health-conscious adults, or families. The first step is to analyze your product’s characteristics and define what kind of packaging it demands.
Consider the cereal’s form—puffed, flaked, or granola-based. The texture and density will determine the need for box sturdiness. Heavier cereals need stronger packaging that won’t collapse under the product’s weight. Flakes and delicate grains require boxes that prevent breakage or crushing during shipping.
You must also align the packaging with your brand identity. For instance, a premium granola might benefit from minimalist aesthetics and earthy colors. In contrast, a fruity cereal for kids should feature vibrant colors and fun illustrations.
Think long-term as well. If you plan to release multiple flavors or editions, consider how your packaging system can scale. Planning at this level helps maintain consistency across your product line while allowing visual flexibility.
Packaging today is also a vehicle for values. Sustainability, transparency, and functionality are expected. Consider how your packaging will reflect those standards. Choose designs that are not just attractive but also practical and aligned with your brand story.
Defining your product’s positioning at this stage eliminates confusion later. It helps everyone—from your designer to your supplier—understand what matters most about your cereal and how it should be presented.
Explore Packaging Materials That Serve Both Function and Aesthetics
Selecting the appropriate box material is critical. It’s the foundation of your cereal packaging. Materials influence durability, print quality, consumer perception, and even your environmental impact.
Paperboard is widely used for its print-friendliness and flexibility. It supports vivid colors and smooth finishes, making it ideal for visually engaging packaging. It’s also lightweight, which is an advantage for shipping and shelf display. However, it may require extra internal barriers if your cereal is moisture-sensitive.
Kraft paper is an excellent choice for organic or eco-focused brands. It has a natural look and is biodegradable. Although it limits certain high-gloss designs, it speaks clearly to conscious consumers who prefer a more grounded, sustainable feel.
If your product is sold online or shipped over long distances, corrugated cardboard offers superior strength. This material isn’t typically seen on retail shelves but is perfect for protective outer packaging. It keeps the product intact and maintains box structure.
Some suppliers offer hybrid options—paperboard with inner lining or multi-layered structures—that improve moisture resistance and shelf-life. Always request technical data or samples before committing.
Materials aren’t just about protection; they help shape your brand’s identity. A box made from 100% recycled fibers and printed with soy-based inks isn’t just eco-friendly—it tells a story your customer will notice.
Collaborate on Design That Reflects Your Brand and Market Intent
Design isn’t just decoration—it’s communication. Your cereal box must speak to consumers instantly. That means clarity, emotional appeal, and information hierarchy all working together.
Begin by building your visual framework. What colors reflect your cereal’s taste and brand promise? If the product is high-protein, cool blues and blacks can signify strength. Fruity blends may benefit from warm, cheerful tones.
Visual consistency across all panels matters. The front should grab attention with the logo, product image, and benefit highlights. The sides can reinforce nutritional info, serving suggestions, or callouts like “gluten-free” or “no added sugar.” The back offers a storytelling space—share your brand mission or customer engagement tools like QR codes and fun games.
Typography plays a strategic role. Choose fonts that match your tone: playful for children, clean for health foods, or bold for energy-driven products. Limit the number of font types for visual harmony.
Also, understand the legal requirements for food labeling. Include nutrition facts, ingredients, allergens, and expiry dates. Your design must incorporate these without overwhelming the consumer with text.
Innovative design goes beyond graphics. Consider box shape—triangular, hexagonal, or curved edges can differentiate your cereal from the competition. Just ensure it doesn’t compromise stackability or shipping efficiency.
Modern packaging is also interactive. Add augmented reality elements or scannable codes linking to product videos or brand stories. These touches engage today’s digital-savvy shoppers in new ways.
Research and Shortlist Packaging Suppliers Based on Performance Metrics
Finding the right packaging supplier is about more than price. It’s about long-term reliability, quality, and partnership. The supplier you choose will directly influence your brand’s success on the shelf.
Begin by checking industry-specific experience. A supplier with a history in food packaging understands compliance, material handling, and shelf-life needs. Their experience ensures fewer mistakes and faster problem-solving.
Ask about customization capabilities. Can they accommodate unique dimensions or premium finishes? Flexibility matters, especially if you plan to evolve your packaging later.
Dive into their print technology. Offset printing provides high-quality, sharp images—ideal for detailed designs. Digital printing offers cost-effective short runs. Choose a supplier who offers both, or at least explains the pros and cons.
Evaluate turnaround times. A reliable supplier can meet your launch schedule without compromising quality. Request samples to test how the box looks, feels, and functions under real-world conditions.
Cost transparency is crucial. Ask for a breakdown—material, labor, shipping, and additional services. This helps you understand where your budget is going and where you can optimize.
Finally, review testimonials or case studies. Speak directly to past clients if possible. A responsive, communicative supplier who honors timelines and stands by their work is a long-term asset.
Configure Your Order on a Professional Platform
Once you’ve selected a supplier, placing your order online should be intuitive. Most professional platforms are designed to guide you through the process step by step.
Start by selecting the box style. Common choices include straight tuck end, reverse tuck end, or crash bottom. Each has its use case based on how your cereal will be displayed or handled.
Next, specify box dimensions. Measure your product accurately to ensure a snug fit. A box that’s too large can waste materials and look sloppy. Too small, and you risk damaging the cereal.
Upload your final design file in the required format—usually PDF, AI, or EPS. Ensure your file includes bleed lines, trim lines, and safe zones for text. This ensures the final print matches your expectations.
You’ll then choose the print method. Offset is great for large volumes. Digital is suited for limited runs or rapid prototyping. Specify any special features like embossing, spot UV, or foil stamping.
At checkout, confirm your shipping preferences. Fast-track orders might cost more but are worth it for tight deadlines. Select your payment method and confirm billing details.
Always review a digital proof before approval. Some suppliers offer 3D mockups, which are incredibly helpful for visualizing the final result. Once approved, production begins, and you’ll receive a tracking number to follow the shipment.
Test and Approve Printed Samples Before Bulk Production
Before going into full production, request a printed sample. This small step saves you from expensive errors and dissatisfaction later.
The sample gives you a chance to review everything—color accuracy, print alignment, material feel, and box integrity. Check for color consistency between your design file and the printed surface. Look for any shifts in tone or contrast that could affect your brand identity.
Open and close the box to test its structural reliability. Does it hold its shape? Are the flaps aligned? Does it reseal smoothly, if applicable? Functionality often separates good packaging from great packaging.
Examine the finish—matte, gloss, or soft touch. Does it match your brand’s feel? A sleek gloss may look modern, but if your brand promotes earthiness, a matte finish may be a better choice.
Provide clear feedback to your supplier. If changes are needed, don’t rush approval. Ask for a revised sample if necessary. It’s better to take time here than to fix problems after 10,000 boxes have been printed.
Final approval marks the turning point. Once satisfied, greenlight production with confidence.
Incorporate Smart Features for Customer Experience and Practical Use
In today’s market, packaging must do more than just hold a product. It must enhance usability, extend shelf life, and sometimes even entertain.
Consider adding smart usability features like:
Tear notches or perforation lines for easy opening
- Resealable tops to preserve freshness
- Windows that reveal product quality
- QR codes linking to brand stories or recipes
- Tactile finishes like embossing for a premium feel
These features improve how customers interact with your product. They also increase the likelihood of repeat purchases. Packaging that considers real-life usage leaves a stronger impression.
Retailers also benefit from well-thought-out features. Boxes that stack cleanly and display neatly improve store presentation. If your box is easy to shelve and store, you gain favor with distributors and retail staff.
Always test smart features during the sample stage. Poor implementation can lead to frustration rather than added value. When done well, functional elements turn basic packaging into a memorable brand experience.
Final Delivery, Fulfillment, and Inventory Management
After approval and production, ensure smooth delivery. Tracking systems provided by your supplier help monitor shipment and avoid delays. Upon arrival, inspect a small batch to ensure consistency across all units.
Next, consider storage and inventory planning. Cereal boxes, even when flat-packed, take up space. Ensure you have a climate-controlled area to store them if they’ll be held for long periods.
If you use a fulfillment center, coordinate delivery directly to their location. This saves time and reduces handling risks. Share specifications with them for seamless product assembly and shipping.
Plan reorders based on sales trends. Track how fast your cereal moves and when it’s time to restock boxes. Always allow extra lead time for design updates or supplier delays.
Having a system in place—from production to fulfillment—keeps your cereal business running smoothly. And with the right cereal box, your product won’t just be protected; it will be proudly displayed and quickly picked up by customers.